How can I create a new Inspeq sub-category/equipment type?
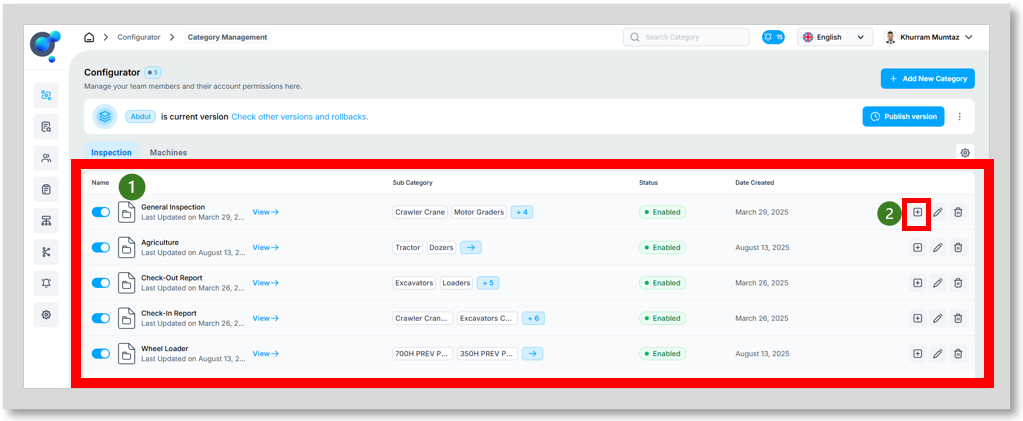
Once your new category has been created you will see this listed on your dashboard (1), you can now start to add the sub-categories or equipment types within that category, click on “Add sub-category” icon (2).
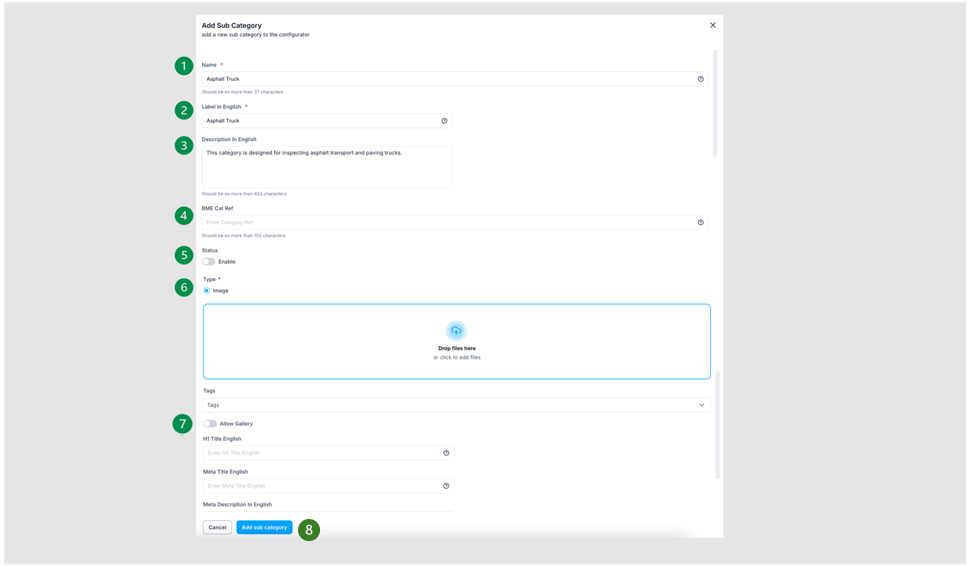
Start filling out all the fields:
Name (1): The internal name for the sub-category/equipment type.
Label in English (2): The public name of the sub-category/equipment type, displayed in English.
Description in English (3): A description of the sub-category/equipment type, written in English.
BME Cat Reference (4): This refers to an XML-based standard developed by the German association BME for the electronic exchange of product catalogue data between suppliers and buyers. It enables machine-readable data integration with systems such as ERPs, PIMs, and e-commerce platforms, ensuring efficient and accurate data communication in B2B transactions. If applicable, you can use this field to align your categories with external systems or catalogues. This field is optional and only necessary if it’s relevant to your workflows.
Status (5): Enable or disable the sub-category, this can also be updated later from the dashboard.
Type (Image) (6): Upload an image to serve as the icon for your sub-category.
Allow Gallery (7): Activate the toggle if you would like to include a gallery in your report and choose the minimum and maximum number of pictures that can be attached.
Click on “Add sub-category” (8).
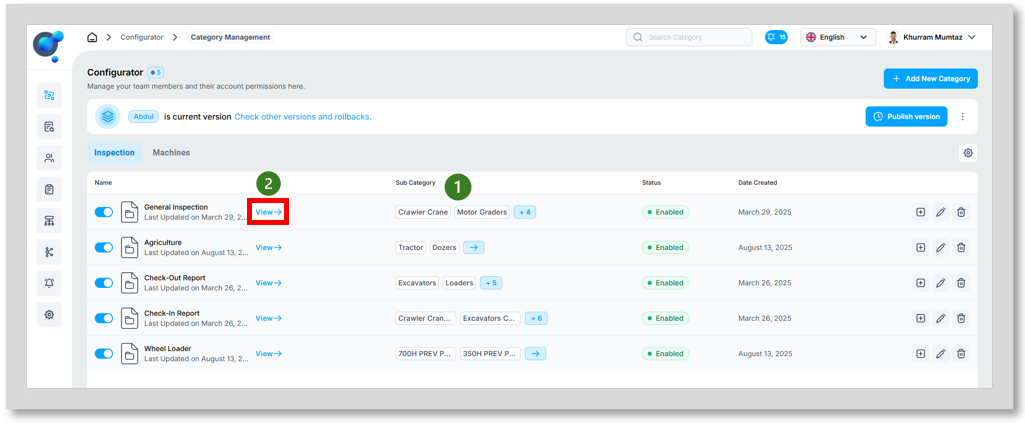
Your new sub-category has been successfully added to the category and will be listed under “Sub-Category” (1). Now that this is created, we recommend you edit it so you can add some important details. For this click on View (2) to configure the next level.
Once you’ve reached the next screen, click on the “Edit” pencil icon (1).
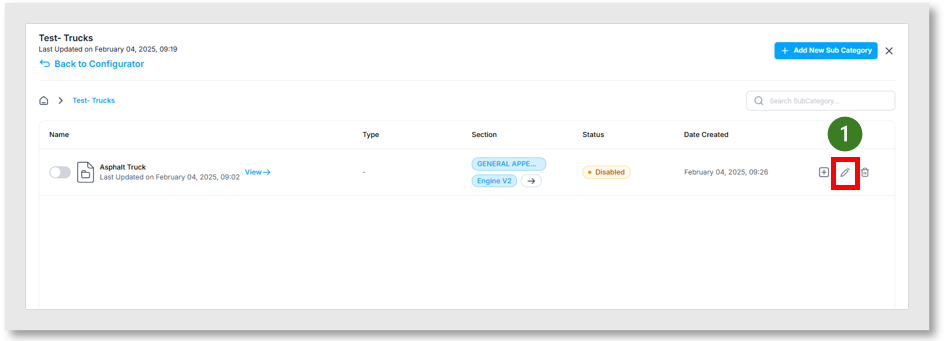
Scroll down the new page until you’ve passed the Image section, you will see 2 new fields:
Header Data Fields (Add to Card) (1): Select the fields you want to include in the General Section of your Inspeq Reports. These fields contain the most important data and will be displayed first.
Dynamic Fields (Add to Card) (2): This one applies to Krank Marketplace so no need to fill this out.
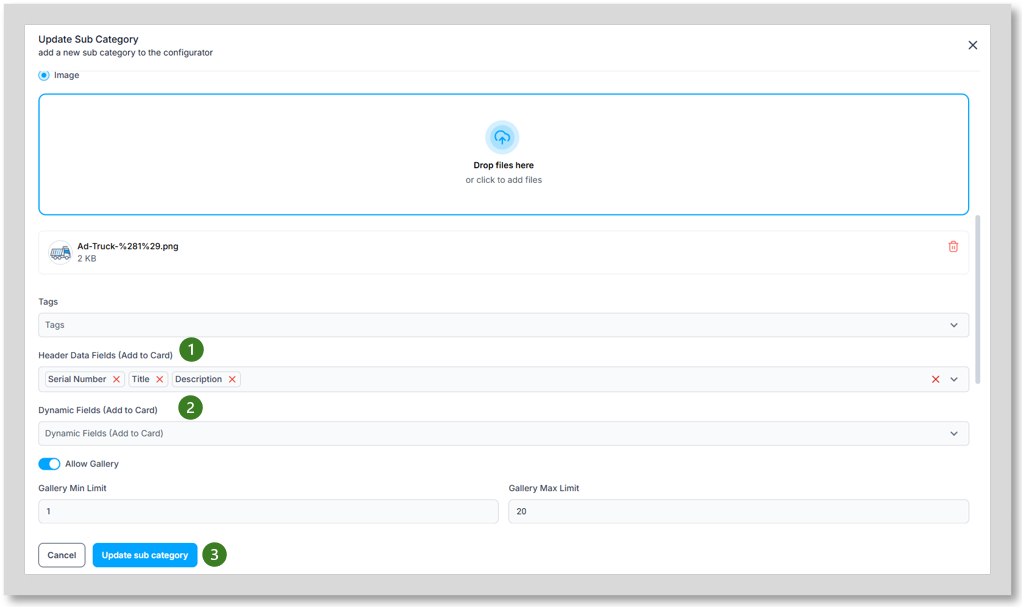
Once you’ve finished adding this information click on “Update sub category” (3).
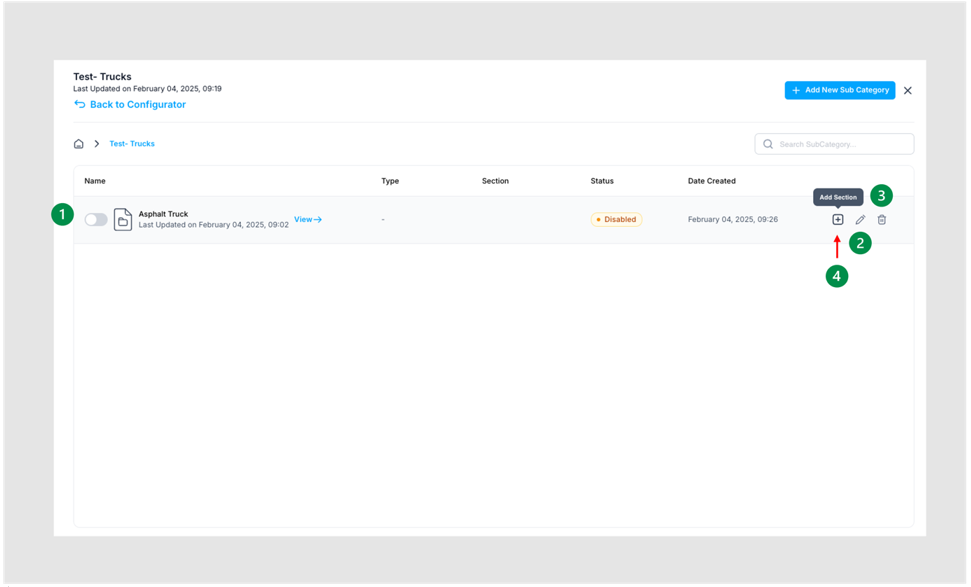
Now that you are at the sub-category level, you can “Activate” or “Deactivate” the sub-category using the toggle (1), Edit (2) or Delete (3) it.
From this screen, you can also create the next level of configuration: Sections. To do so, click on “Add Section” (4).