Adding Users to Clusters
When click “View” (1) on the cluster dashboard you will open the networks overview page for that Cluster (2).
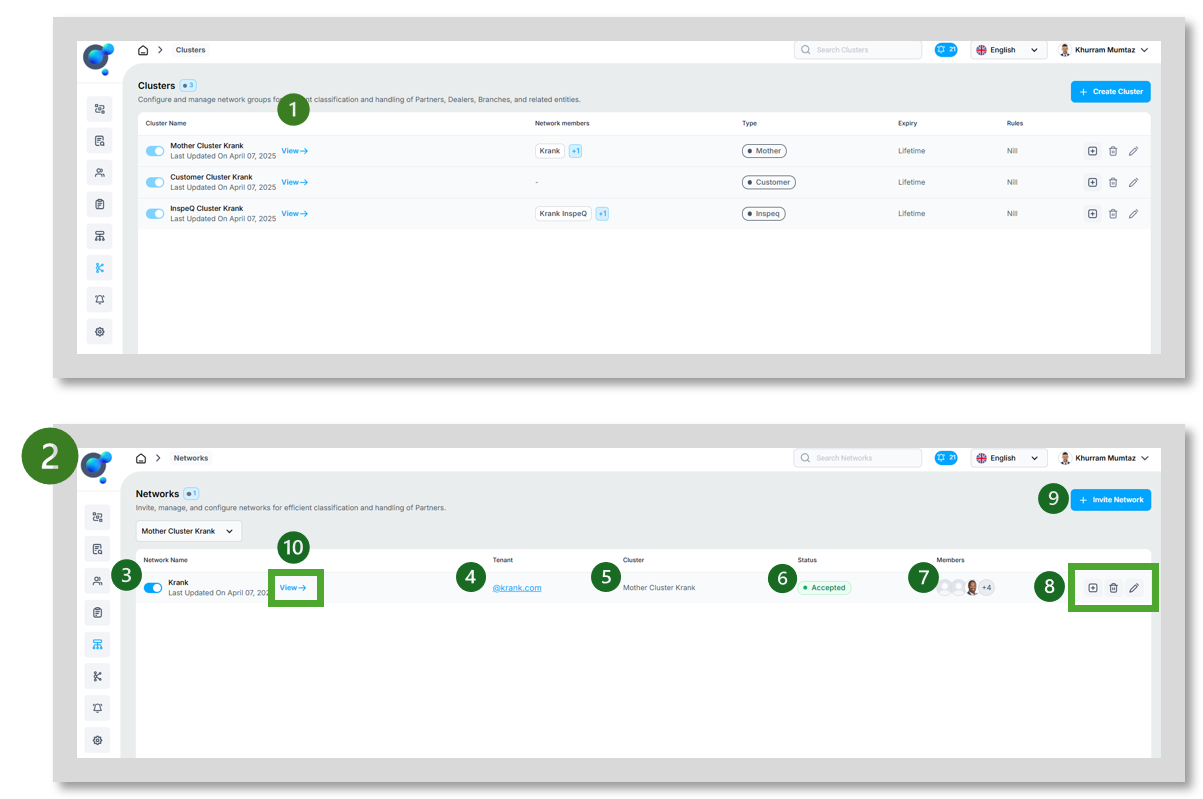
Here you can view and manage all networks set up within that cluster.
Enable/Disable (3) Switch network on or off when required without the need to delete.
Tennant (4) shows any domains set up for the network.
Cluster (5) confirms all clusters network is set up with, these being the products the users have access to.
Status (6) shows if the network has been accepted and is live.
Members (7) shows the number of users in the network.
Add user, delete and edit network (8): Further manage your networks. Adding a user to your network will open a new screen.
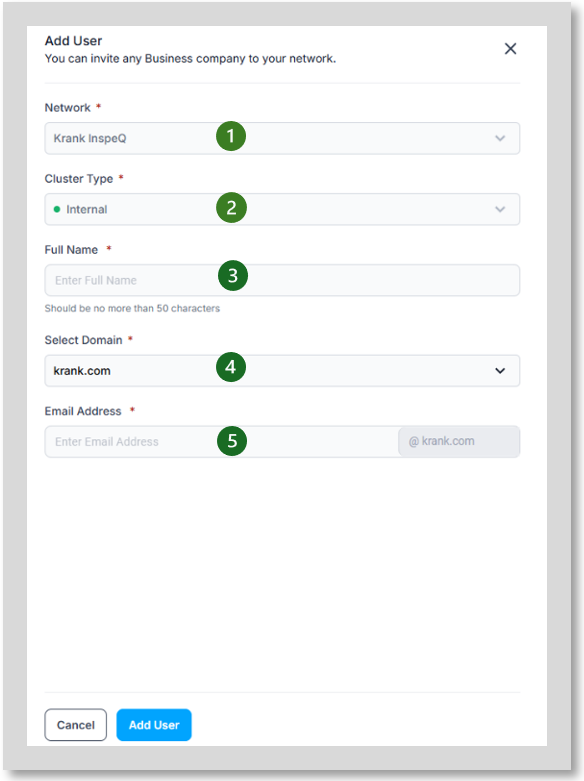
Add users to a network by providing:
o Network (1) This will be automatically filled depending on the network you are working on.
o Cluster Type (2) This will be automatically filled depending on the cluster settings.
o Full name (3) Provide full name of user.
o Select Domain (4) Drop down with all domains set up for selection.
o Email Address (5) Enter first part of email as domain already populated.
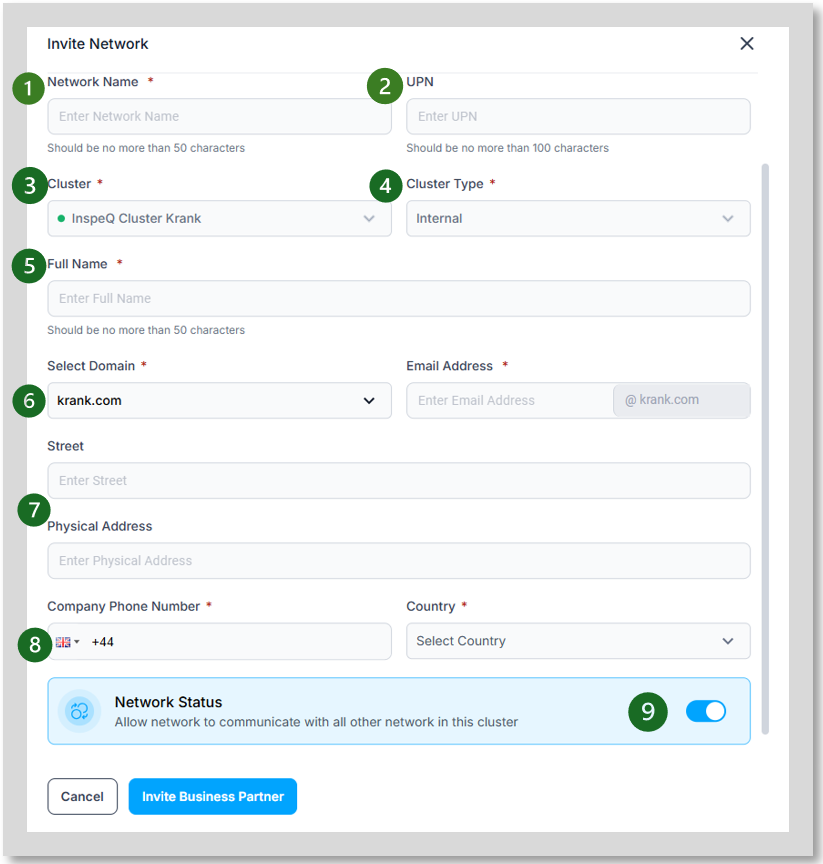
Invite Network (9) Invite networks from your organization into your cluster, be aware of the cluster type (Internal/External). If internal, ensure the network is part of your organization before proceeding.
· Network Name (1) decide on a relevant name for the network.
· UPN (2) option to include a
· Cluster (3) will be automatically filled with cluster you are working from.
· Cluster Type (4) will be automatically filled will the cluster type detail.
· Full Name (5) Provide full name of first user.
· Select Domain and Email Address (6) Drop down with all domains set up for selection and enter first part of email as domain already populated.
· Street and Physical Address (7) not mandatory, can include the extra details if you wish.
· Company Phone Number and Country (8) add user phone number and country.
· Network Status (9) This will allow the network to communicate with other networks set up in the cluster, toggle on/off.
· Click “Invite Business Partner”.
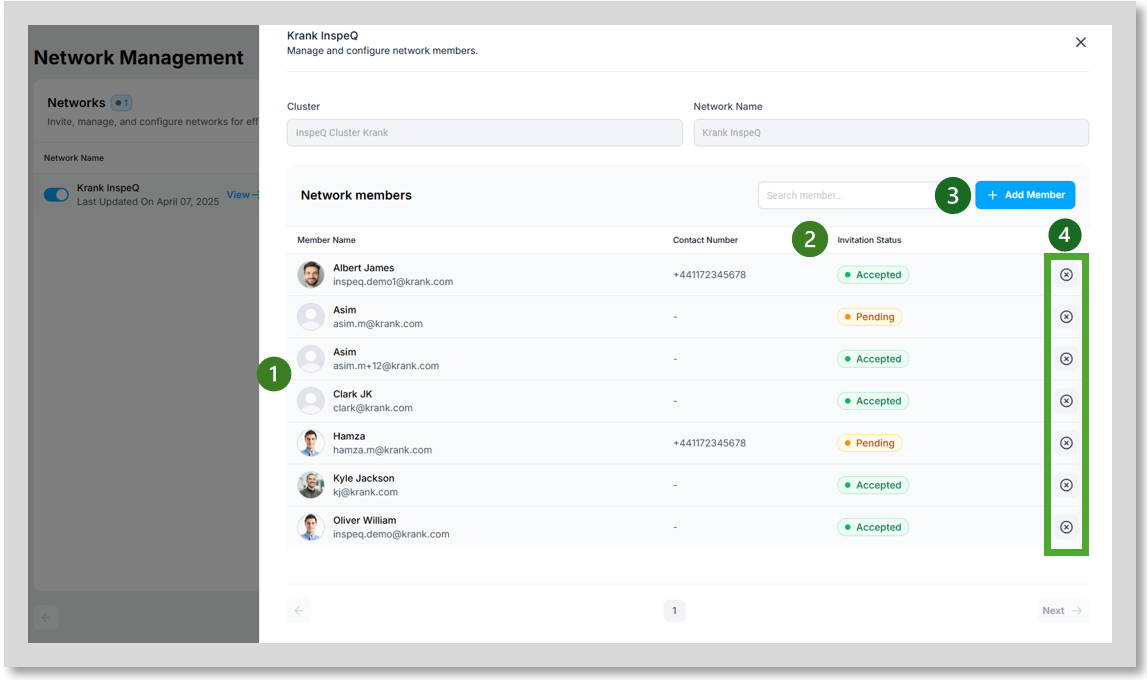
Clicking on “View” (10) on the Network Management dashboard will open a view of all network members (1). This view also allows you to view the “Invitation Status” (2) of the users.
NOTE: It is possible to get a more detailed breakdown on where in the sign up process the user is still pending by going to “User” under “User & Auth Management” on the left hand navigation bar. This will be covered in the “User & Auth Management” section of the Knowledge Base.
The network members dashboard also allows for adding (3) and removing (4) users from the network.